✨
搭建一个开箱即用的基于 Next.js + TailwindCSS + Prettier + TypeScript 的工程
编写此笔记时所使用的Next.js版本为14.2.3
相关文档
项目初始化
pnpm create next-app
💡
通过上述交互式命令的选项,我们创建了一个带有ESLint的基于 Next.js 脚手架的 React 项目
配置EditorConfig
新建.editorconfig,设置编辑器和 IDE 规范,内容根据自己的喜好或者团队规范
# https://editorconfig.org
root = true

[*]
charset = utf-8
indent_style = space
indent_size = 2
end_of_line = lf
insert_final_newline = true
trim_trailing_whitespace = true

[*.md]
insert_final_newline = false
trim_trailing_whitespace = false
配置ESLint和Prettier
脚手架预设的ESLint还不够完善,这里直接使用Nuxt团队的Anthony Fu大佬的eslint-config进行完善
pnpm dlx @antfu/eslint-config@latest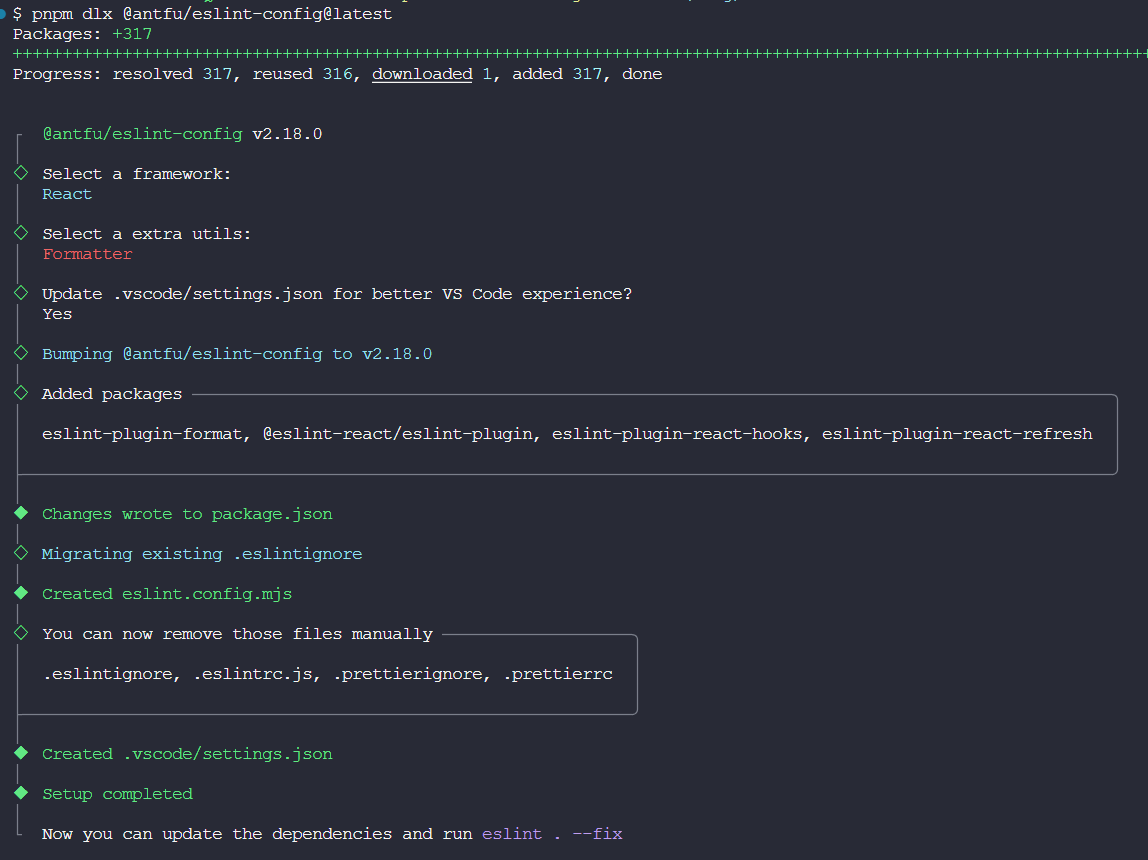
编辑eslint.config.mjs
import antfu from '@antfu/eslint-config'

export default antfu({
  ignores: ['node_modules', '**/node_modules/**', 'dist', '**/dist/**', '.next', '**/.next/**'],
  formatters: true,
  typescript: true,
  react: true,
})编辑package.json,添加如下内容
{
  // ...
  "scripts": {
    // ...
    "lint": "eslint .",
    "lint:fix": "eslint . --fix"
  }
}
由于 Anthony Fu 大佬的这套eslint-config默认禁用prettier,如果你想配合prettier一起用的话就安装它(不用的话就跳过),然后在根目录新建.prettierrc,填入自己喜欢的配置
pnpm add -D prettier{
"$schema": "https://json.schemastore.org/prettierrc",
"semi": false,
"tabWidth": 2,
"printWidth": 120,
"singleQuote": true,
"trailingComma": "es5"
}接着编辑.vscode/settings.json,把prettier启用即可
{
  "prettier.enable": true
  // ...
}
环境变量
关于 Next.js 的环境变量详细文档看这里
UI框架
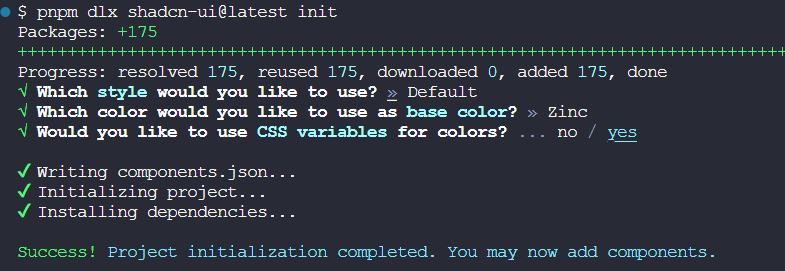
使用shadcn
Shadcn和TailwindCSS默认是绑定在一起的,会自动安装TailwindCSS
pnpm dlx shadcn-ui@latest init根据自己的喜好选择就行
类排序插件
pnpm add -D prettier prettier-plugin-tailwindcss编辑.prettierrc,注册插件
{
  "plugins": ["prettier-plugin-tailwindcss"]
}
TailwindCSS debug插件
pnpm add -D tailwindcss-debug-screens编辑app/layout.tsx和tailwind.config.ts
// ...
import { cn } from '@/lib/utils'

export default function RootLayout({
  children,
}: Readonly<{
  children: React.ReactNode
}>) {
  return (
    <html lang="en">
      <body className={cn('debug-screens', inter.className)}>{children}</body>
    </html>
  )
}// ...
const config = {
// ...
theme: {
debugScreens: {
position: ['bottom', 'right'],
ignore: ['dark'],
},
// ...
},
plugins: [
// 开发模式下加载显示屏幕大小的插件
process.env.NODE_ENV === 'development' && require('tailwindcss-debug-screens'),
],
}设置字体
编辑app/layout.tsx和tailwind.config.ts
// ...
const inter = Inter({ subsets: ['latin'], variable: '--font-sans' })

export default function RootLayout({
  children,
}: Readonly<{
  children: React.ReactNode
}>) {
  return (
    <html lang="en">
      <body className={cn('debug-screens min-h-screen bg-background font-sans antialiased', inter.variable)}>
        {children}
      </body>
    </html>
  )
}// ...
import { fontFamily } from 'tailwindcss/defaultTheme'
const config = {
// ...
theme: {
// ...
extend: {
fontFamily: {
sans: ['var(--font-sans)', ...fontFamily.sans],
},
// ...
},
},
}使用Vant
pnpm add react-vant @react-vant/icons
pnpm add -D next-images next-compose-plugins编辑next.config.js
const withPlugins = require('next-compose-plugins')
const withImages = require('next-images')
/** @type {import('next').NextConfig} */
const nextConfig = {
  typescript: {
    ignoreBuildErrors: true,
  },
  transpilePackages: ['react-vant'],
}
module.exports = withPlugins([withImages], nextConfig)
移动端适配
pnpm add -D postcss-px-to-viewport-8-plugin⚡ 注意
由于Vant使用的设计稿宽度是375,而通常情况下,设计师使用的设计稿宽度更多是750,那么Vant组件在750设计稿下会出现样式缩小的问题
解决方案: 当读取的node_modules文件是vant时,那么就将设计稿宽度变为375,读取的文件不是vant时,就将设计稿宽度变为750
编辑postcss.config.js,增加如下postcss-px-to-viewport-8-plugin配置项
const path = require('path')
module.exports = {
  plugins: {

    'postcss-px-to-viewport-8-plugin': {
      viewportWidth: (file) => {
        return path.resolve(file).includes(path.join('node_modules', 'react-vant')) ? 375 : 750
      },
      unitPrecision: 6,
      landscapeWidth: 1024,
    },
  },
}